faster R-CNN 모델을 사용해보겠습니다
필요한 2shot.jpg와 환경 설정은 yolov5 ( python에서 yolov5 모델을 이용해보기 ) 사용과 같습니다.
Faster R-CNN 모델이 여러가지가 있는데 모바일에 최적화된 v3버전을 사용해보겠습니다.
torchvision에는 mobile v3보다 성능이 더 좋은 일반 v2 (FasterRCNN_ResNet50_FPN_V2) 버전도 있으니 참고하시면 좋습니다.
#!/usr/bin/env python3

import torch
from torchvision.io.image import read_image
from torchvision.models.detection import fasterrcnn_mobilenet_v3_large_fpn
from torchvision.models.detection import FasterRCNN_MobileNet_V3_Large_FPN_Weights
from torchvision.utils import draw_bounding_boxes
from torchvision.transforms.functional import to_pil_image
from collections import Counter

img = read_image("./2shot.jpg")

weights = FasterRCNN_MobileNet_V3_Large_FPN_Weights.DEFAULT
#model = fasterrcnn_mobilenet_v3_large_fpn(weights=weights, box_score_thresh=0.3)
model = fasterrcnn_mobilenet_v3_large_fpn(weights=weights)
model.eval()

preprocess = weights.transforms()

batch = [preprocess(img)]

result = model(batch)[0]
labels = [weights.meta["categories"][i] for i in result["labels"]]
print(Counter(labels))
box = draw_bounding_boxes(img, boxes=result["boxes"],
                          labels=labels,
                          colors="red",
                          width=4, font_size=30)
im = to_pil_image(box.detach())
im.show()
출력결과는
Counter({'person': 71, 'car': 11, 'traffic light': 8, 'motorcycle': 4, 'bus': 3, 'truck': 2, 'bicycle': 1})
yolov5에서는 person 10, car 4 이었는데
좀 더 최신의 mobile r-cnn에서는 더 많이 detection 한것을 볼 수 있습니다.
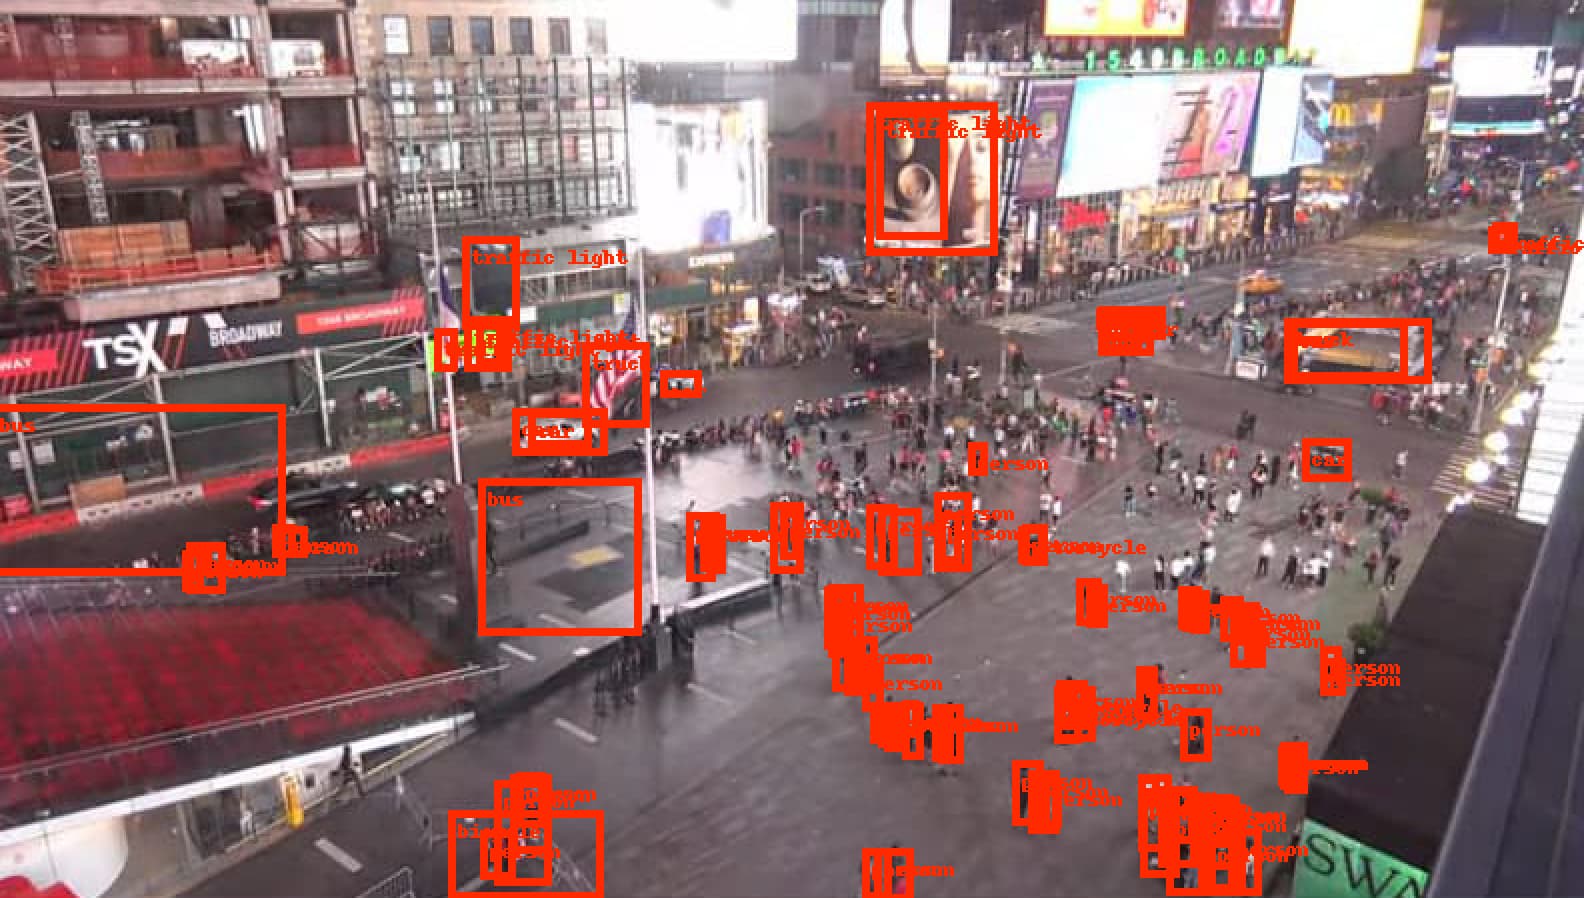
일반적인 이야기지만 최신의 모델이 더 좋고, 사용하는 환경마다 다 다르게 나오므로 참고만 하시고 사용하시기 바랍니다.
참조 : torchvision model 문서( Models and pre-trained weights — Torchvision 0.21 documentation )